The Bouncing Heart
Since a short GIF is always good and uses limited colors. Your GIF might turn out to be grainy if you use too many colors. So it is better to create a bouncing heart animation using only three colors – red, white, and blue.
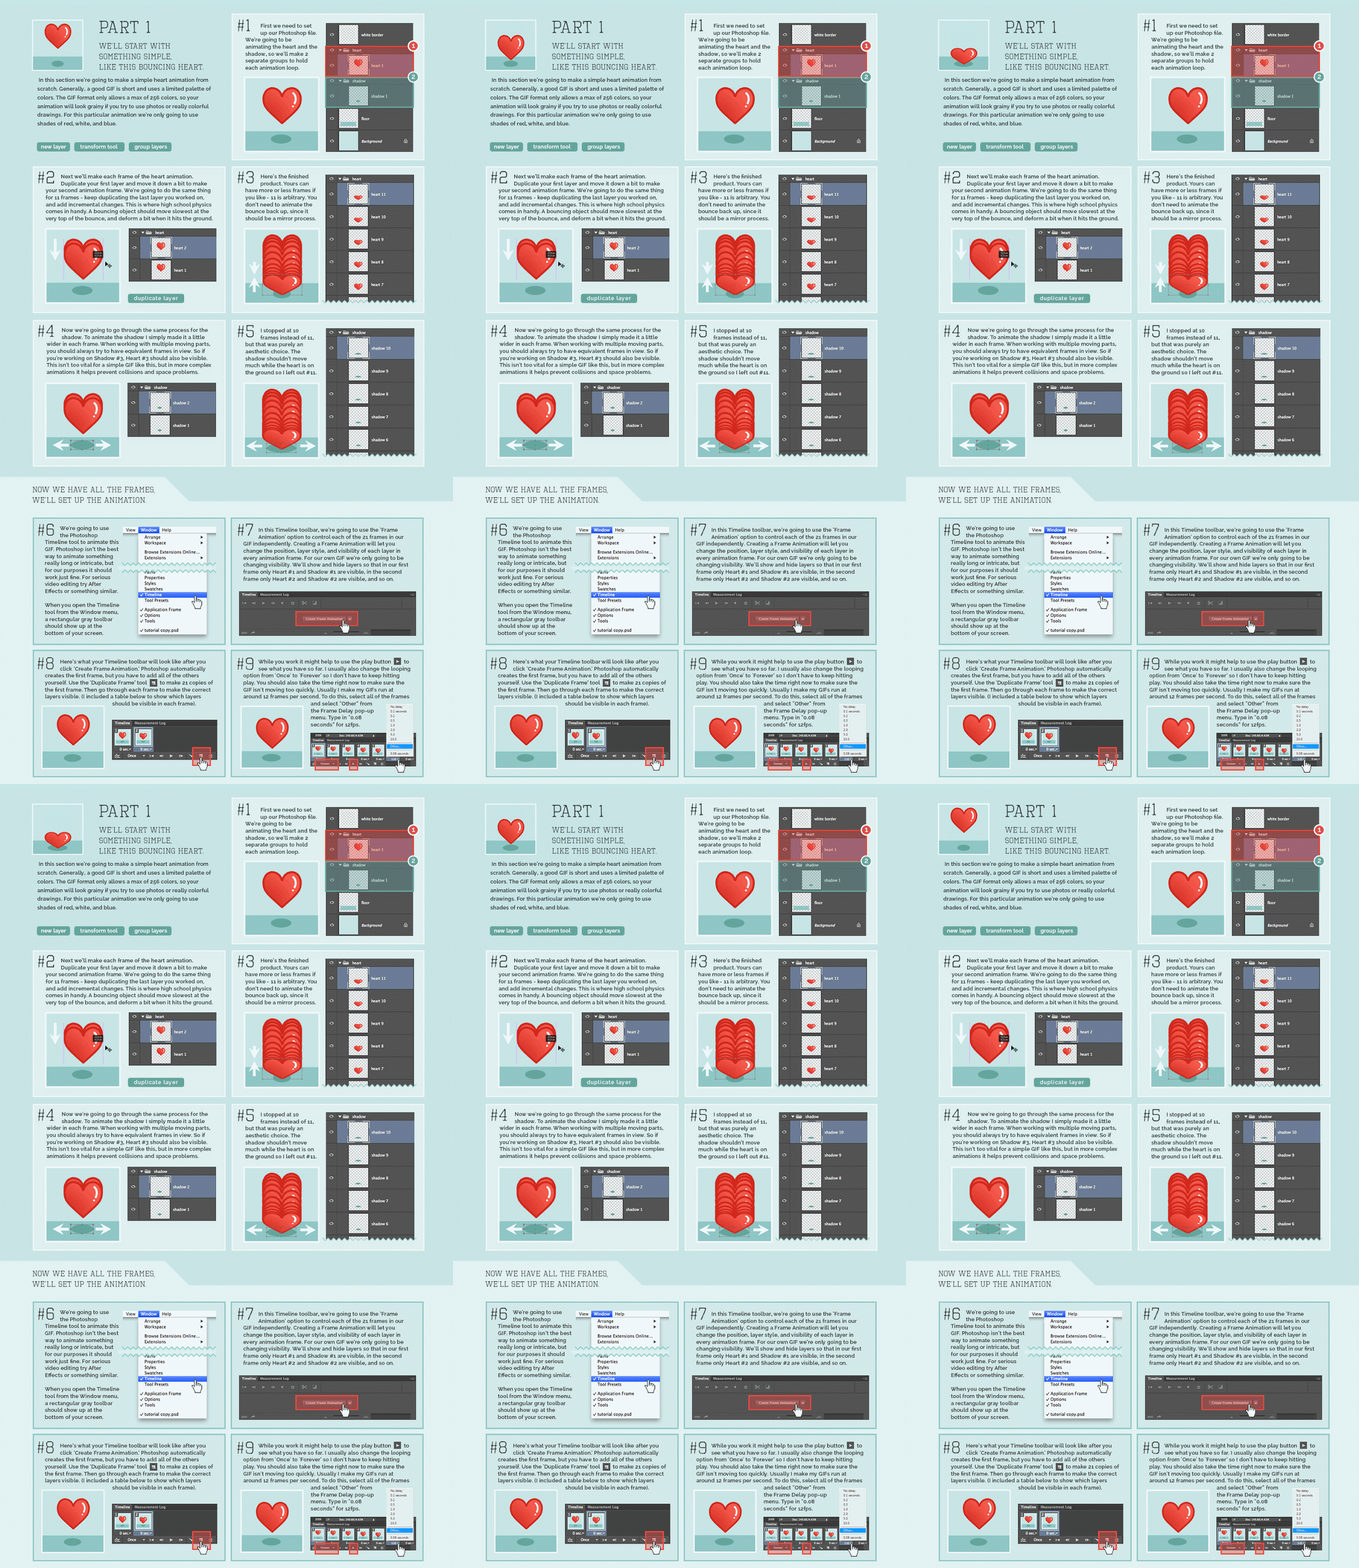
- Create a new PS file, and three separate layers, one with a heart, one consisting a shadow and third with a floor area
- Now, to create a bouncing effect, start duplicating the layer with hearts until you get eleven frames of hearts
- Do the same with the shadow, but increase it width-wise in each frame
- Make sure you are keeping all the equivalent frames in view, like shadow#3, heart#3
- The shadow should not move when the heart touches the ground, so, 10 frames will be just perfect instead of 11
- The animation frame is ready now, and it is time to apply animation
- Go to Windows, select “Timeline” and a grey rectangular bar will pop up at the bottom of the screen
- Now choose “Frame Animation” to control all 21 frames independently
- Although “Frame Animation” is used to change the position, visibility and layer style in each frame, you just need to change the visibility here
- Show and hide layers in a way that Heart#1 and Shadow#1 are visible together in the first frame and Heart#2 and Shadow#2 are visible in the second frame
- The first frame will be automatically created but the rest need to be done by you
- You can use “Duplicate Frame Tool” to create 21 copies of the first frame and then go through each frame to ensure the right layers are visible
- To check the output, click on the play button, or choose “Once” to “Forever” to avoid hitting the play button again and again
- Adjust the timing at which you want your GIF to be moving
- You can do this by selecting all the frames and then choosing the “Option” – “Other from Frame Delay Pop-Up” and type in the time.

